How to Make Yogurt at Home with Milk
Yogurt is a healthy yummy food, and one that is enjoyed all over the world for thousands of years. is a wonderful addition to any diet rich in probiotics and calcium, and is also loaded with protein. While store bought yogurt is readily available, there are plenty of benefits to making at home with milk: you control the ingredients, the texture and the flavor, and it can be cheaper in the long run.
Today, i am responding to your requests for me to publish a complete guide to making yogurt at home with milk, so i will show you step by step in an easy way on how to make yogurt with milk at home. And we’ll show you how to make sure your homemade is always perfect, explain the health benefits and just how to enjoy it. At the end of it, you’ll be able to supply a batch of yogurt like a pro!
Why Should You Make Yogurt at Home?
Before we dive into the recipe, let’s quickly talk about why making yogurt at home is a great idea:
- Cost Savings: If you prefer going organic, it’s cheaper to make yogurt at home than to keep buying small tubs at the store. If you’re able to make a bigger batch, you can do it for less money.
- Control Over Ingredients: It is your decision what goes in your t. No preservatives, artificial flavors, or unnecessary sugars—just pure, wholesome ingredients. Plus, you can make it as thick and creamy as you want, or thinner and tangier.
- Freshness and Flavor: Making a batch of homemade is absolutely nothing like what you get out of a carton or package. Homemade doesn’t taste any differently plain or flavored, but it is richer and more authentic tasting than most store bought is.
- Probiotic Boost: Made at home, yogurt is full of live probiotic cultures which can help promote a healthy gut microbiome, help with digestion and boost your immune system.
- Eco-Friendly: Making at home reduces the need for plastic containers which helps in reducing packaging waste and by doing so make you live a more sustainable life.
What You’ll Need to Make Yogurt at Home
Ingredients
- Milk: Regardless of which variety you choose to use, you can go for whole milk, 2 percent milk, skim milk, or even nondairy alternatives like almond or coconut milk, but dairy milk is the one you can trust the most for making. Full fat milk will make richer and creamier yogurt, low fat or fat free milk will result in a thinner .
- Yogurt Starter: For this, it can be plain yogurt (with live, active cultures from the store) or a powdered starter. To do this, you only need a little bit, about two tablespoons of plain for every quart (liter) of milk.
- Optional Add-Ins: Once the is done fermenting you can add sweeteners (honey or sugar), or vanilla extract or fresh fruit. If you prefer a flavored , these will add some flavor.
Equipment
- Heavy-bottomed saucepan: This is for heating your milk without scorching.
- Thermometer: A kitchen thermometer is crucial for ensuring the milk reaches the right temperature.
- Whisk: To mix in the starter evenly.
- Jars or containers: For storing the yogurt during the incubation process.
- Towel or insulating material: To keep the warm during the incubation period.
- Cheesecloth (optional): If you want to strain your yogurt to make Greek .
Step-by-Step Instructions: How to Make Yogurt at Home with Milk
Step 1: Choosing and Preparing the Milk
Ironically, milk is the first—and, arguably, most important—ingredient. Different types of milk should be used and they will have a major impact on flavor and consistency of your yogurt. Here are your options:
- Whole milk: Produces rich, thick yogurt with a creamy texture.
- 2% milk: Yields a lighter, still with some creaminess.
- Skim milk: It makes thinner yogurt with less richness.
- Non-dairy milk: Use of almond milk, coconut milk or soy milk is available. But most nondairy milk doesn’t reach the proper consistency, and they require thickeners like agar-agar or cornstarch to do so instead.
Step 2: Heating the Milk
Heat a heavy bottom saucepan until hot over medium heat. Be sure not to let the milk stick to the bottom or even worse form skin on top: The aim is to heat the milk up to 180°F (82°C). This step is essential for two reasons:
- Kills unwanted bacteria: Heating the milk eliminates harmful bacteria and creates a clean environment for the yogurt cultures to grow.
- Changes the milk proteins: In addition, heating will change the structure of the proteins in the milk so that the will set correctly.
Take the milk off heat once milk reaches 180°F.
Step 3: Cooling the Milk
The milk has to cool down to 110°F (43°C), the best temperature to mix with the starter after it has been heated. That’s okay, too hot and they’ll die, too cold they won’t grow!
If leaving the milk at room temperature you can put the pot in an ice bath or just let it cool naturally. Stir the milk at regular intervals to transfer the cooling right around to the milk.
Step 4: Adding the Yogurt Starter
About an hour later, we will drop in the yogurt starter, when the milk has cooled to 110 degrees. Use plain with live active cultures, available in the store (make sure it’s not flavored or sweetened), or use a powdered starter.
If you’re using live cultures like, and if you’re using a full quart (liter) of milk, then for every quart (liter) of milk I add 2 tablespoons of and whisk it in really really good to make sure I get the culture in there very even.
Choosing the Right Starter
- Use store bought if so, but make sure it has live active cultures. While some commercial yogurts are fermented, then pasteurized (killed) to create a shelf stable product, it also leads to the death of beneficial bacteria.
- However, if you’re using homemade as starter for the next batch the cultures can weaken. The best way to replace the starter between batches is to use fresh store-bought yogurt.
Step 5: Incubating the Yogurt
Here is the magic part where care is taken by folding the open mask right side inwards and then fully seal the pipes with a folded over piece of masking tape. Mix starter into milk and pour into clean jars or containers, cover with lids or plastic wrap.
However, one of the keys to successful fermentation is that the mixture stays warm for a period of time of 6 to 12 hours at 100°F to 110°F (38°C to 43°C). Here are a few methods to incubate your yogurt:
- Oven Method: Put the jars in the oven, turn it off, and preheat your oven to the lowest temperature possible. Keep the oven light on to stay warm.
- Yogurt Maker: But a maker supplies constant heat, so that incubating is a simple, foolproof process.
- Cooler Method: Put the jars inside an insulated cooler (with a few towels for extra insulation). Keep the cooler warm by adding warm water (about 110°F) into the cold water.
- Heating Pad or Electric Blanket: Place the jars in a towel and put them on a low setting heating pad or place them on an electric blanket.
The thicker and tangier your will get the longer it ferments. If you like your a little on the milder side, a little tarter, check it out after six hours. Let it ferment for up to 12 hours for a thicker tangier flavor.
Step 6: Chilling the Yogurt
After that, your yogurt will be set and ready in texture, transfer to fridge and chill for a minimum of 2 – 3 hours. Stopping the fermentation process and firming up more, chilling helps.
Step 7: Flavoring the Yogurt
If you like plain yogurt, you’re good to go! But if you’d like to flavor it, here are some tasty options:
- Vanilla Yogurt: A sweet, aromatic flavor can be added by stirring in a teaspoon of vanilla extract.
- Honey or Maple Syrup: Spoon a tablespoon of organic honey or maple syrup to add natural sweetness.
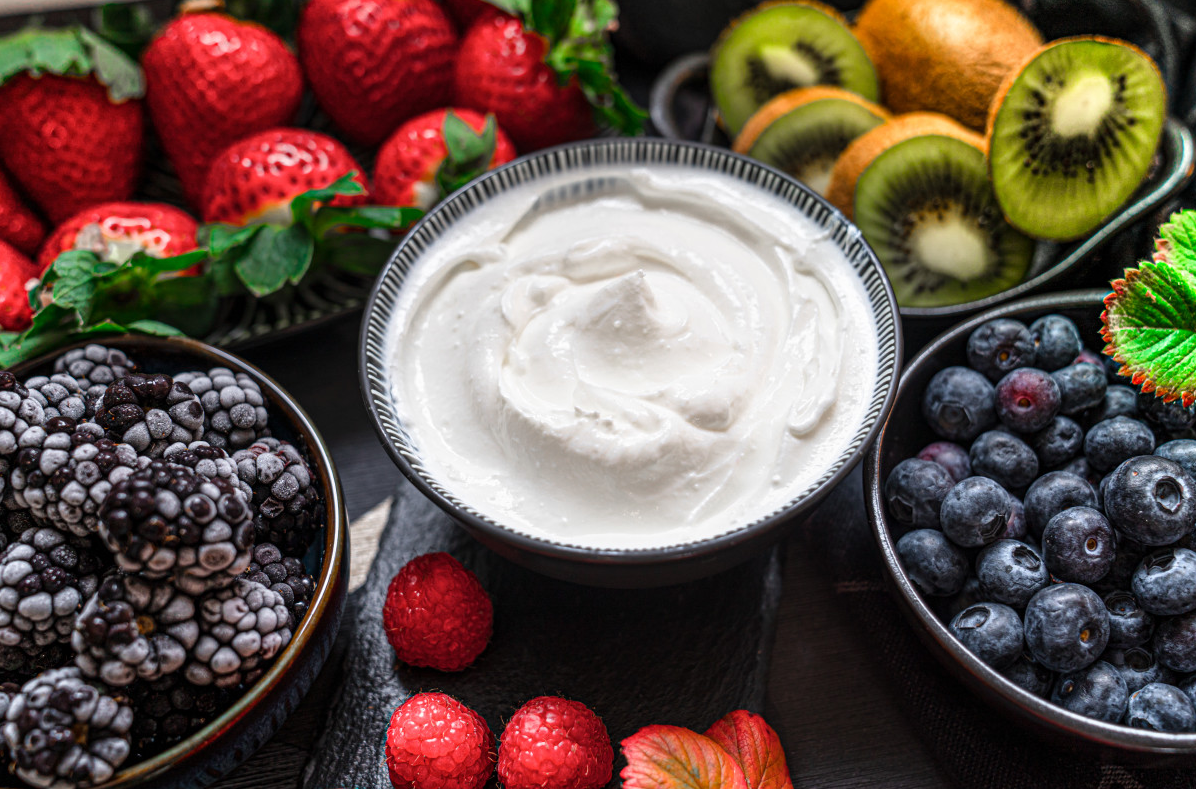
- Fruit Purees: Stir in some blend fresh or frozen fruits into your yogurt to give it a fruity kick. Strawberries, blueberries, peaches, and mangoes are popular of choice.
- Chocolate Chips or Granola: Finish with some chocolate chips or granola for a little fun, crunchy fun.
Step 8: Storing and Using Homemade Yogurt
Once you’ve made your yogurt, stow in the fridge in an airtight jar. Homemade lasts about 2 weeks, even though you may find the flavor of your becomes tangier as the fermentation process continues, slowly, in the fridge.
If you’re going to use it often, save a few tablespoons of your current batch as a starter for the next one.
Tips for Success
Making yogurt at home is easy once you get the hang of it, but here are some extra tips to ensure the best results:
- Use Fresh Starter: If you’re using store-bought as your starter, be sure to pick something fresh and loaded with live active cultures. Do not use flavored or sweetened yogurt, it can interfere with the fermentation process.
- Temperature Control: In order to incubate the PBH and not kill the betanin during this process, the correct temperature is key. But too much heat will kill the bacteria, and too little will slow the fermentation. Be accurate, use a thermometer.
- Patience is Key: The tangier and thicker your yogurt is, the longer you incubated the. Don’t keep checking on the too often; doing so will throw it off the fermentation process.
- For Greek Yogurt: If you want thicker yogurt, strain the finished for a few hours through a cheesecloth. This will allow you cream, Greek yogurt with no excess whey built up.
Health Benefits of Homemade Yogurt
The nutrients in yogurt make it a powerhouse, and it’s full of probiotics, which are beneficial bacteria that help keep the gut healthy. Here are some of the top health benefits of incorporating homemade yogurt into your diet:
- Improved Digestion: Yogurt contains probiotics that help regulates your gut flora to improve digestion and prevent problems such as bloating, constipation and diarrhea.
- Stronger Immune System: Also, healthy gut to strong immune system is so important, and the probiotics in yogurt help build your body’s natural defense.
- Bone Health: Too much calcium can be a problem, but yogurt is a rich source of calcium and vitamin D, which are needed to keep your bones strong and prevent osteoporosis.
- Protein Power: Nutritious yogurt is a great source of protein — essential for muscle repair, growth, and bodily function.
- Weight Management: When you feel full, it helps you control your weight better.
Delicious Ways to Enjoy Homemade Yogurt
Beyond eating yogurt plain there are countless ways to enjoy your homemade yogurt. Here are some creative ideas:
- Breakfast Bowl: A nutritious, filling and easy breakfast is to top your yogurt with granola, fresh fruit, chia seeds and drizzle of honey.
- Smoothies: For a creamy, probiotic packed smoothie, blend your with some fruits and veggies and a splash of juice or milk.
- Salad Dressings: Tangy creamy salad dressings are based on . It’s very simple to just mix with herbs, garlic, lemon juice, and olive oil to make a super healthy dressing.
- Frozen Yogurt: Frozen yogurt stays good for several days in the refrigerator, turned into a healthy frozen treat by adding fruit and sweeteners if you freeze it.
If you follow these steps, you can make healthy, delicious yogurt at home. After you’ve got the basics down, you can start doing your own thing with flavors, textures (like sugar), and add-ins to get you whatever kind of yogurt you want. Enjoy your homemade yogurt as they are snacks, in a meal, or in your favorite recipes!
more information reading please visit my website
- Marry Me Lentils (Dal Makhani) – India’s Viral Food Sensation in August 2025

- Ultimate Guide to Making Lemon Blueberry Dump Cake – 2025’s #1 Trending Dessert

- How to Make Authentic Mutton Yakhni Pulao at Home – Desi Flavor in Every Bite

- Creamy Chicken Alfredo Recipe Easy Homemade Delight Step by Step Guide

- Protein-Rich Cottage Cheese Wrap Recipe – The Viral 10-Minute High-Protein Meal Everyone’s Talking About!

- How to Make Alfredo Sauce Recipe at Home

- Top Trending Recipes in Pakistan 2025 for Dinner

- How to Make an Old Fashioned Cocktail at Home: A Step-by-Step Guide

- How to Make a Spicy Chocolate Chip Cookie Recipe: A Fiery Twist on a Classic Treat