How to Make Biryani at Home with Basmati Rice

Biryani is an unbelievable dish that has caught the hearts and taste buds of individuals all over the planet. Beginning from the Indian subcontinent, biryani joins fragrant basmati rice, delicate meat or vegetables, and a mixture of flavors to make a good, delightful one-pot feast. Whether it’s an extraordinary event or an easygoing family feast, biryani is much of the time the focal point of the festival. The uplifting news is, you don’t need to trust that an exceptional occasion will partake in this delightful dish. In this far reaching guide, we’ll walk you through how to make biryani at home utilizing basmati rice, bit by bit, so you can reproduce this sweet-smelling, mouth-watering dish in your own kitchen!
The Significance of Biryani
Biryani is significantly more than simply a dish — it’s a piece of social legacy for some networks. With its underlying foundations in Mughal cooking, biryani has been culminated and gone down through ages, developing in various areas with their exceptional turns. The ideal biryani unites the lavishness of flavors, the aroma of basmati rice, and the delicacy of the meat or vegetables. At the point when made right, each nibble offers an eruption of flavors, from zesty to exquisite to somewhat sweet.
By making biryani at home, in addition to the fact that you get to partake in its tastiness, however you likewise enjoy the benefit of utilizing new, great fixings custom fitted as you would prefer. In this recipe, we’ll utilize basmati rice, known for its long grains and sweet-smelling aroma, which is the best decision for biryani. We should plunge into the recipe!
Ingredients for Biryani

Here is a definite rundown of the multitude of fixings you should make this customary biryani:
| Ingredient | Quantity |
| Basmati rice | 2 cups |
| Chicken (or meat of choice) | 500g |
| Onions (daintily sliced) | 2 enormous |
| Tomatoes (chopped) | 2 medium |
| Yogurt (plain, unsweetened) | 1/2 cup |
| Ginger-garlic paste | 2 tablespoons |
| Green chilies (slit) | 2 |
| New coriander leaves | 1/4 cup |
| New mint leaves | 1/4 cup |
| Ghee or vegetable oil | 3 tablespoons |
| Cinnamon stick | 1-inch piece |
| Cloves | 4 |
| Cardamom pods | 3 |
| Inlet leaves | 2 |
| Cumin seeds | 1 teaspoon |
| Red stew powder | 1 teaspoon |
| Turmeric powder | 1/2 teaspoon |
| Garam masala | 1 teaspoon |
| Salt | To taste |
| Water (for cooking rice) | 4 cups |
| Saffron strands (optional) | A few strands |
| Lemon juice | 1 tablespoon |
Step-by-Step Guide to Making Biryani
Since you have every one of the fixings prepared, now is the ideal time to begin cooking! Follow these point by point moves toward make a tasty biryani at home.
Step 1: Rinse and Soak the Basmati Rice
Begin by washing the basmati rice completely under cool water. This helps eliminate abundance starch and guarantees the rice doesn’t become soft. Flush the rice until the water runs clear. Once flushed, absorb the rice water for somewhere around 30 minutes. Dousing helps the rice cook equally and keeps it from breaking during cooking.
Step 2: Marinate the Meat
Take your chicken (or favored meat) and cut it into medium-sized pieces. In a bowl, join the chicken with yogurt, ginger-garlic glue, red bean stew powder, turmeric powder, garam masala, and salt. Blend well so the meat is equitably covered with the marinade. Allow the meat to marinate for something like 30 minutes. The more you marinate, the more delicate and delightful the meat will be.
Step 3: Fry the Onions
In a huge dish or pot, heat 2 tablespoons of ghee or vegetable oil over medium intensity. Add the daintily cut onions and sauté them until they become brilliant brown and fresh. This will require around 8-10 minutes. When they’re firm, eliminate the onions from the skillet and put them away. These broiled onions are a fundamental piece of the biryani, adding a profound, exquisite flavor.
Step 4: Cook the Meat
In a similar dish, add the marinated meat and cook over medium intensity. Mix every so often to guarantee that the meat browns equally on all sides. Once caramelized, add hacked tomatoes and cook for another 5-7 minutes until the tomatoes relax and mix into the blend. On the off chance that the combination begins to adhere to the dish, you can add a little water or stock to forestall consuming. Right now, add the cut green chilies for additional character.
Step 5: Cook the Rice
In a different pot, heat 4 cups of water to the point of boiling. To this bubbling water, add the narrows leaves, cinnamon stick, cloves, cardamom cases, and cumin seeds. These entire flavors will imbue the water with rich, sweet-smelling flavors. When the water is bubbling, add the doused basmati rice and cook the rice until it is around 70% done — this generally requires around 8-10 minutes. Once finished, channel the water from the rice and put it away.
Step 6: Layering the Biryani
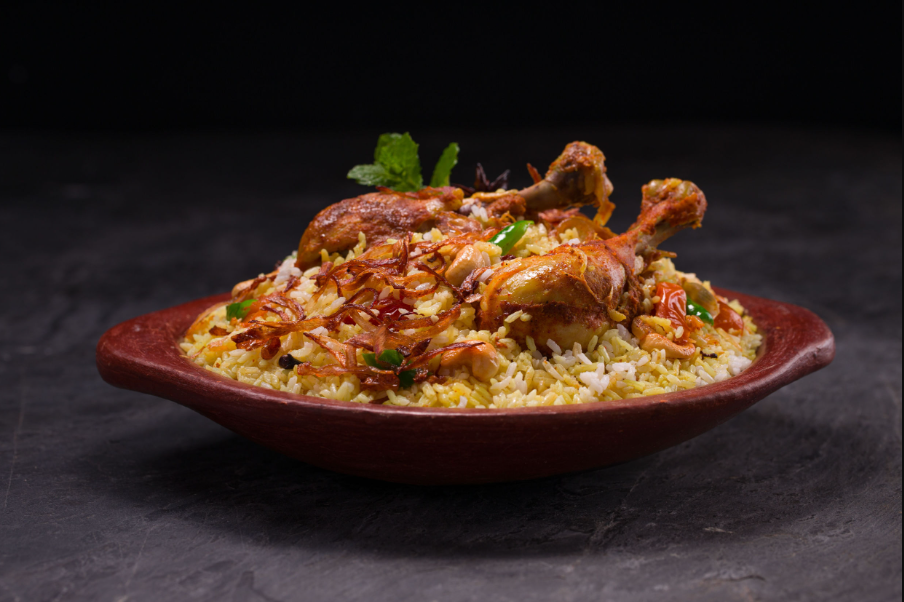
Presently it is the ideal time to layer the biryani. In an enormous, weighty lined pot, start layering the dish. To begin with, add a layer of the cooked meat combination at the base. Then, at that point, delicately layer the to some degree cooked basmati rice over the meat. Rehash the layering system if vital. Subsequent to adding the rice, sprinkle the broiled onions, new mint, and new coriander leaves on top for an eruption of newness and flavor.
On the off chance that you’re utilizing saffron, absorb a couple of strands a tablespoon of warm milk and shower it over the rice for that notable brilliant variety and fragrant smell. Crush a tablespoon of lemon juice over the top to add a hint of causticity that adjusts the extravagance of the biryani.
Step 7: Dum Cooking (Steam Cooking)
When the rice and meat are layered, cover the pot with a tight-fitting top. In the event that you don’t have a tight top, you can seal it with mixture or utilize a fabric under the top to trap the steam. Cook on extremely low intensity for around 25-30 minutes. This sluggish cooking process, known as “Dum,” assists the flavors with merging together and guarantees that the rice turns out to be entirely delicate without overcooking.
Step 8: Serve and Enjoy
When the biryani is cooked, let it rest for around 10 minutes prior to opening the top. This resting time assists the flavors with settling. From that point forward, tenderly cushion the rice with a fork, blending in the meat and the fragrant spices. Serve your biryani hot, with a side of ratio (yogurt-based fixing), salad, or bubbled eggs on the off chance that you like.
Health Benefits of Key Ingredients in Biryani

- Basmati Rice: Basmati rice is a low-glycolic file food, which makes it a superior choice for overseeing glucose levels contrasted with different sorts of rice. It additionally contains fiber, which advances stomach related wellbeing.
- Ginger and Garlic: These two fixings are stacked with cell reinforcements and calming properties. They likewise assist with processing and helping invulnerability.
- Mint and Coriander: The two spices help absorption and are plentiful in nutrients and cancer prevention agents that assist with detoxifying the body.
- Yogurt: Yogurt contains proboscis, which backing stomach wellbeing and absorption. It additionally softens the meat when utilized in marinades.
Possible Side Effects and Allergies
While biryani is a delicious and nutritious dish, it’s important to be aware of potential allergens and side effects:
- Flavors: A few people might encounter stomach related uneasiness or sensitivities from flavors like cumin, cardamom, or stew powder. In the event that you are delicate, change how much these flavors to suit your resistance.
- Dairy: The yogurt utilized in the marinade can be an issue for people with lactose prejudice or dairy sensitivities. You can substitute yogurt with sans dairy options if necessary.
- Nuts: A few biryani varieties might contain nuts like cashews or almonds, which can set off hypersensitive responses in touchy people.
Assuming you have any known sensitivities, make certain to change the recipe to stay away from fixings that could cause a response.
Final thoughts
Making biryani at home with basmati rice is a remunerating experience that permits you to make a tasty, sweet-smelling dish without any preparation. This conventional recipe isn’t just ideally suited for unique events yet in addition for a consoling family feast. By following this point by point, bit by bit guide, you’ll have the option to set up a heavenly, eatery quality biryani that will wow your visitors. Partake all the while, the scent, and, obviously, the fabulous taste of your hand crafted biryani!
Happy cooking!
more information reading please visit my website
- Marry Me Lentils (Dal Makhani) – India’s Viral Food Sensation in August 2025

- Ultimate Guide to Making Lemon Blueberry Dump Cake – 2025’s #1 Trending Dessert

- How to Make Authentic Mutton Yakhni Pulao at Home – Desi Flavor in Every Bite

- Creamy Chicken Alfredo Recipe Easy Homemade Delight Step by Step Guide

- Protein-Rich Cottage Cheese Wrap Recipe – The Viral 10-Minute High-Protein Meal Everyone’s Talking About!

- How to Make Alfredo Sauce Recipe at Home

- Top Trending Recipes in Pakistan 2025 for Dinner

- How to Make an Old Fashioned Cocktail at Home: A Step-by-Step Guide

- How to Make a Spicy Chocolate Chip Cookie Recipe: A Fiery Twist on a Classic Treat