How to Make Onigiri at Home
Onigiri, otherwise called Japanese rice balls, is a customary Japanese dish that is straightforward yet fulfilling. This simple to-make nibble has a rich history and is cherished by individuals all around the world for its flexibility, versatility, and heavenly flavors. Onigiri is frequently ready with prepared rice, formed into shapes like triangles or balls, and loaded up with different appetizing fillings. Whether you’re new to Japanese food or a carefully prepared fan, making onigiri at home can be a tomfoolery and compensating experience.
In this definite aide, we will walk you through all that you want to be aware of making onigiri at home, from choosing fixings to molding the rice balls and adding flavor-pressed fillings.
A Brief Introduction to Onigiri
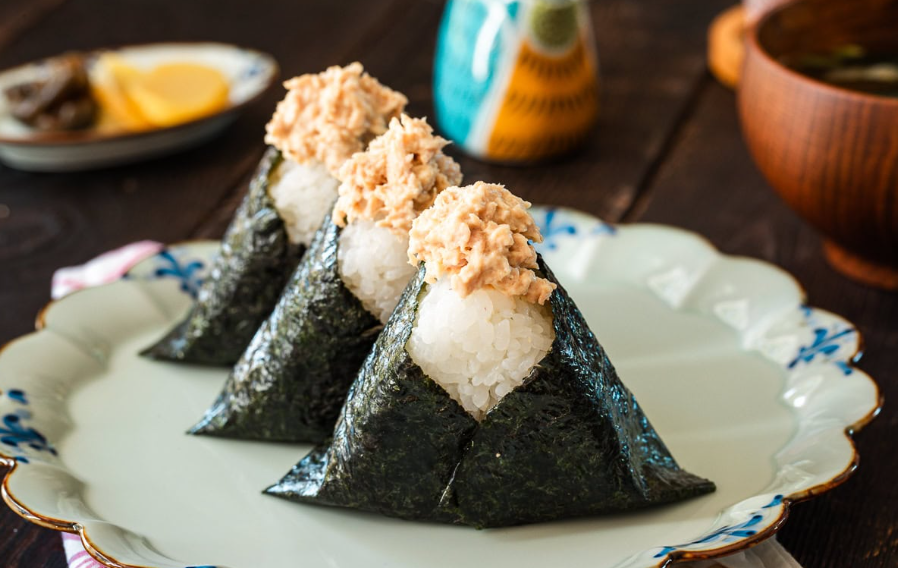
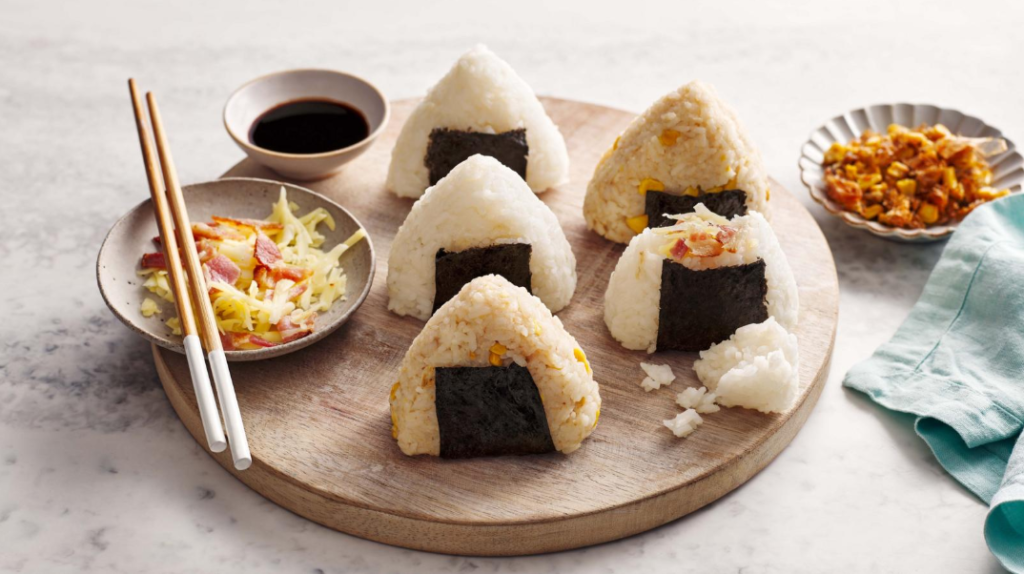
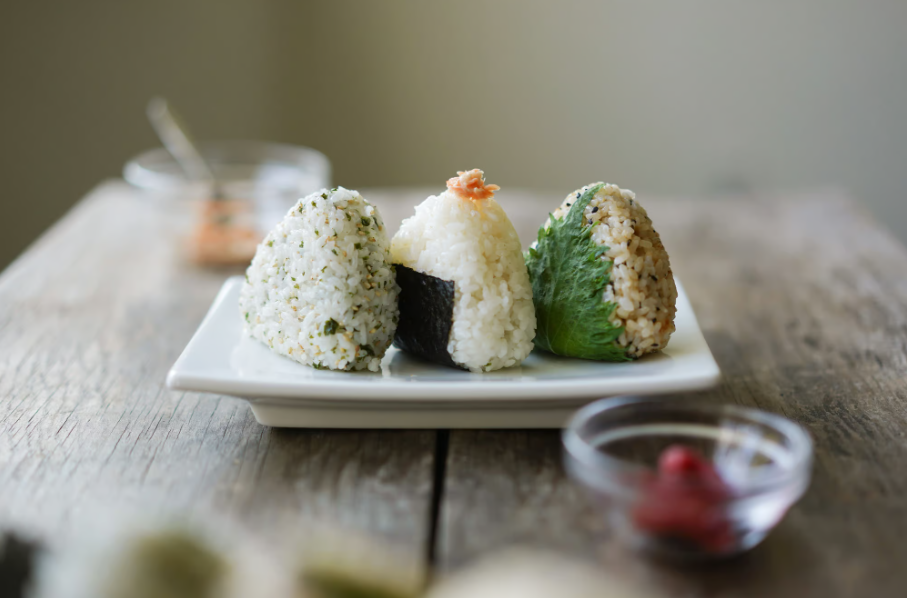
Onigiri has been a well known nibble in Japan for quite a long time. It’s generally expected eaten in a hurry, as a speedy lunch, or as a component of a cookout. Onigiri is made by squeezing prepared rice into a shape, regularly a triangle or oval, and afterward enveloping it by nori (ocean growth) for added flavor and surface. The fillings inside the rice can change extraordinarily, including umeboshi (cured plums), fish, salmon, and even vegetables.
Onigiri isn’t simply delectable, but at the same time it’s a helpful and quality feast choice. With rice being a staple in numerous Asian societies, this dish gives a fair measure of carbs and can be matched with different protein-rich fillings. Whether you’re pressing it for a lunchbox or getting a charge out of it at home, onigiri makes a wonderful bite or dinner.
Table of Ingredients
Before you begin, here’s a rundown of the fixings you’ll have to make onigiri. This recipe makes around 6-8 rice balls.
| Ingredient | Quantity |
| Short-grain sushi rice | 2 cups |
| Water | 2 ½ cups |
| Salt | 1 teaspoon |
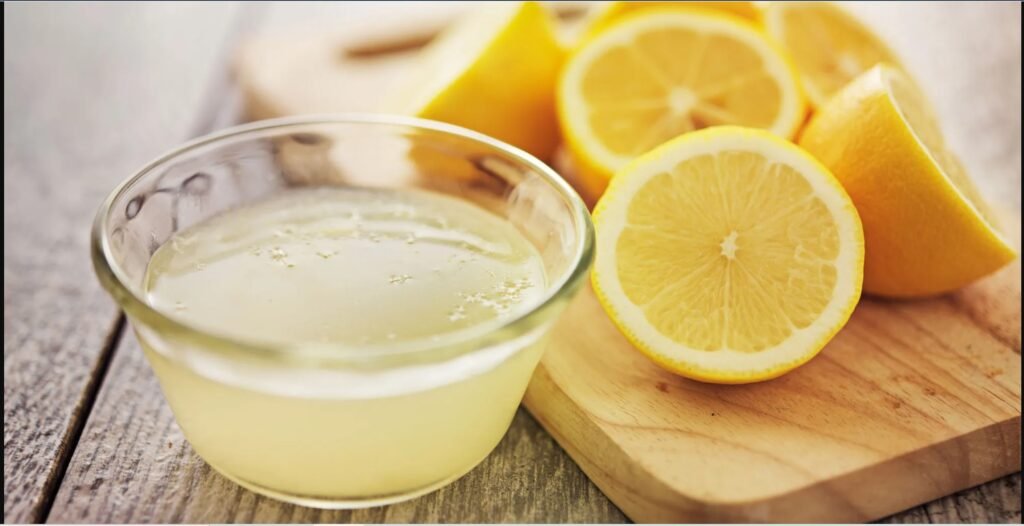
| Rice vinegar | 2 tablespoons |
| Sugar | 1 tablespoon |
| Nori (seaweed) | 4 sheets |
| Filling of decision (e.g., umeboshi, fish, salmon, or vegetables) | ½ cup |
Optional Add-ins and Variations:
- You can add sesame seeds to the rice for additional crunch and flavor.
- In the event that you like fiery food sources, you can blend in some sriracha or bean stew chips to the rice or filling.
- Have a go at adding salted vegetables like takuan (cured radish) for a fiery bend.
Step-by-Step Preparation Method
Step 1: Rinse and Cook the Rice
The initial step to making wonderful onigiri is cooking the rice. Onigiri is customarily made with short-grain sushi rice, which is tacky and keeps intact well, making it ideal for molding. Begin by washing the rice completely under cool water until the water runs clear. This assists with eliminating overabundance starch and guarantees the rice will have the right surface when cooked.
When the rice is washed, move it to a rice cooker or a pot and add 2 ½ cups of water. Cook the rice as per your rice cooker’s guidelines or on the oven. If cooking on the oven, heat the water to the point of boiling, lessen the intensity, and let it stew for around 15 minutes or until the rice is delicate and completely cooked. When the rice is finished, let it sit for 10 minutes to steam and settle before you continue to the subsequent stage.
Step 2: Season the Rice
While the rice is cooking, set up the flavoring for the rice. In a little bowl, join 2 tablespoons of rice vinegar, 1 tablespoon of sugar, and 1 teaspoon of salt. Mix until the sugar and salt are completely broken down. When the rice is finished and marginally cooled, tenderly overlap in the vinegar combination, being mindful so as not to pound or break the rice. The vinegar adds a marginally tart flavor to the rice, which impeccably supplements the exquisite fillings you pick.
Allow the carefully prepared rice to cool to a temperature that is sufficiently agreeable to deal with your hands, yet don’t allow it to cool totally. Warm rice is more straightforward to form into shape and will remain together better.
Step 3: Shape the Onigiri
To shape the onigiri, wet your hands with a little water to keep the rice from adhering to your fingers. Take a little small bunch of the carefully prepared rice (around 2 tablespoons) and level it somewhat in your palm. Then, place your picked filling in the middle. Fillings can go from umeboshi (salted plum) to fish or cooked salmon, making this an exceptionally adjustable bite.
Cautiously overlap the rice around the filling and structure it into a triangle or oval shape. The key is to press the rice tenderly however immovably, it is safely encased to guarantee that the filling. On the off chance that you favor a more uniform shape, you can utilize a plastic onigiri form to shape the rice into wonderful triangles.
Step 4: Wrap with Nori (Optional)
While the onigiri is scrumptious all alone, adding a sheet of nori (ocean growth) upgrades the flavor and gives a fantastic crunch. Cut the nori into strips or sheets, contingent upon your inclination, and fold it over the foundation of your onigiri. Certain individuals favor wrapping the entire rice ball in nori, while others simply wrap the base to hold the rice ball together and allow the top to stay uncovered.
The nori will relax as it comes into contact with the rice, so it’s ideal to wrap the onigiri just prior to serving. On the off chance that you’re pressing the onigiri for some other time, it’s really smart to keep the nori separate until you’re prepared to eat.
Step 5: Serve and Enjoy!
Your natively constructed onigiri is currently fit to be delighted in! Serve the rice balls as a tidbit, lunch, or part of a bento box. Onigiri is likewise perfect for picnics or as a feast in a hurry. On the off chance that you’re not eating them right away, enclose them by cling wrap or store them in a water/air proof holder to keep them new. While onigiri can be put away in the ice chest for as long as two days, they are best eaten around the same time.
Health Benefits of Key Ingredients
Onigiri isn’t simply delectable; it likewise accompanies an assortment of medical advantages, contingent upon the fixings you use.
- Short-Grain Sushi Rice: This kind of rice is a decent wellspring of carbs, giving energy to the body. It’s likewise wealthy in fiber, which upholds stomach related wellbeing. Sushi rice is not difficult to process and settles glucose levels, pursuing it an extraordinary decision for a reasonable dinner.
- Rice Vinegar: Rice vinegar adds flavor to onigiri without adding numerous calories. It’s additionally accepted to have stomach related benefits and may assist with further developing stomach wellbeing.
- Nori (Ocean growth): Nori is a profoundly nutritious fixing, offering a scope of nutrients and minerals, like iodine, iron, and calcium. It likewise contains cancer prevention agents and fiber, adding to in general wellbeing.
- Fish Fillings (Fish or Salmon): Fish like fish and salmon are wealthy in omega-3 unsaturated fats, which are fundamental for heart wellbeing and mind capability. Omega-3s are likewise mitigating, making these fillings a fantastic expansion to your onigiri.
- Vegetable Fillings: Involving vegetables as fillings adds fiber, nutrients, and minerals to your onigiri. Vegetables like cucumbers, carrots, and spinach can help the dietary benefit of the dish.
Possible Side Effects or Allergies
While onigiri is by and large safe for a great many people, there are a couple of interesting points, particularly on the off chance that you have food sensitivities or responsive qualities:
- Rice Sensitivity: Albeit intriguing, certain individuals might be oversensitive to rice. Side effects of a rice sensitivity might incorporate stomach related issues, skin rashes, or trouble relaxing. In the event that you have a rice sensitivity, consider utilizing options like quinoa or millet.
- Fish Sensitivities: Assuming you pick fish-based fillings like fish or salmon, remember that these may set off unfavorably susceptible responses in individuals who are adversely affected by fish. Make certain to illuminate anybody you’re serving about the fish utilized in the onigiri.
- Sodium Levels: Some onigiri fillings, as umeboshi (cured plums) or salted fish, can be high in sodium. On the off chance that you’re on a low-sodium diet, best to select fillings are lower in salt or utilize less pungent flavors.
Final thoughts
Onigiri is a scrumptious, solid, and adaptable dish that is not difficult to make at home. Whether you’re preparing a lunch, setting up an excursion, or just hankering a bite, onigiri is a flexible treat that can be customized to suit your taste inclinations. By following this bit by bit guide, you can excel at making onigiri and partake in its flavors and medical advantages. So why not check it out? With only a couple of fixings and a little imagination, you can make your own delectable onigiri directly in your kitchen!
more information read please visit my website
- How to Make Meatloaf Recipe: Step-by-Step Guide

- How to Make Smash Burger at Home Step by Step Guide

- How to Make Birria Tacos at Home

- How to Make a Shirley Temple Drink at Home step by step guide

- 🍨 How to Make Ice Cream at Home Easily – Step-by-Step Guide

- How to Make Lasagna Recipe at Home: A Step-by-Step Guide

- How to Make Enchiladas in the Oven at Home: A Delicious and Easy Recipe

- How to Make Gyoza Easy at Home: A Simple and Delicious Recipe
- How to Make Takoyaki Easily at Home: A Complete Guide